Virtual Reality
Hello! In this post I will share some test I have done to build my own virtual-reality headset. The amount of small-decision that must be made to go from a sketch to a working prototype are the ones that will make your build good or not: a lot depends on the materials you are using, and I believe 3D printing is seriously the best choice, but it was not a possibility for me so I had to do differently.
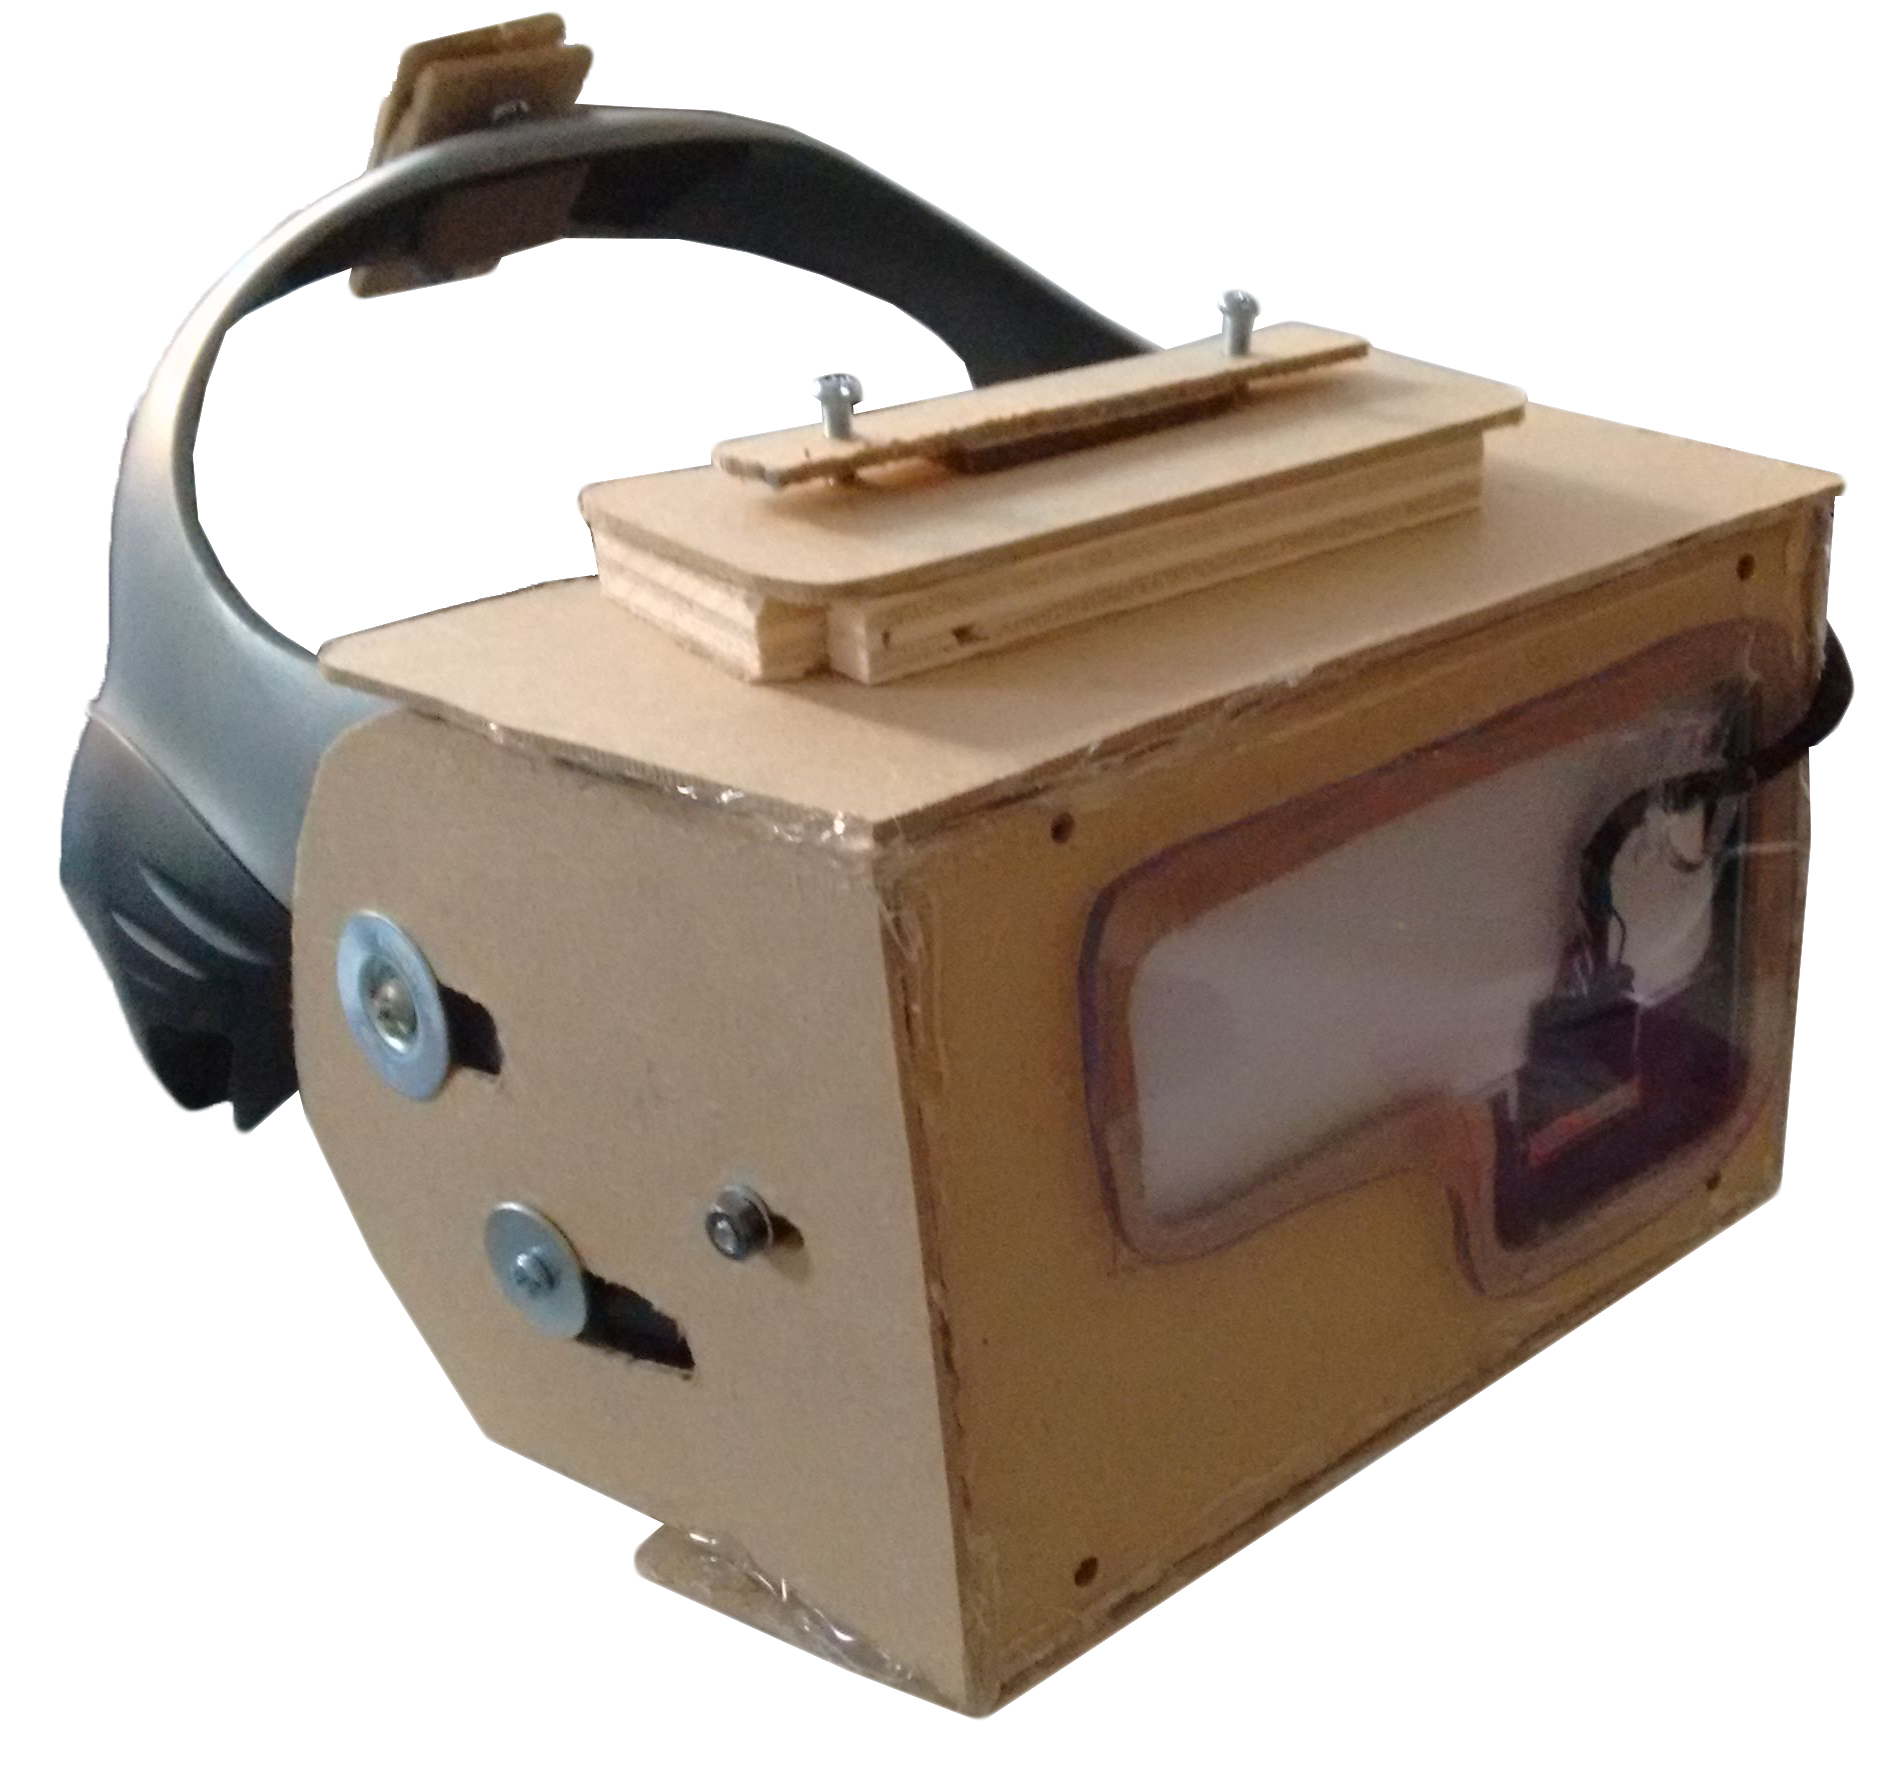
The first attempts that I have made where with cardboard, and some very wide magnification lenses from some scrap hardware, and as the material is very easy to work with, it turned out pretty robust. With this cardboard frame, I used my phone as monitor and I was able to enjoy some games and videos, but the best experience was using it for movies while lying in bed! (always considering if you have the right-sized display on your phone for your eyes!)
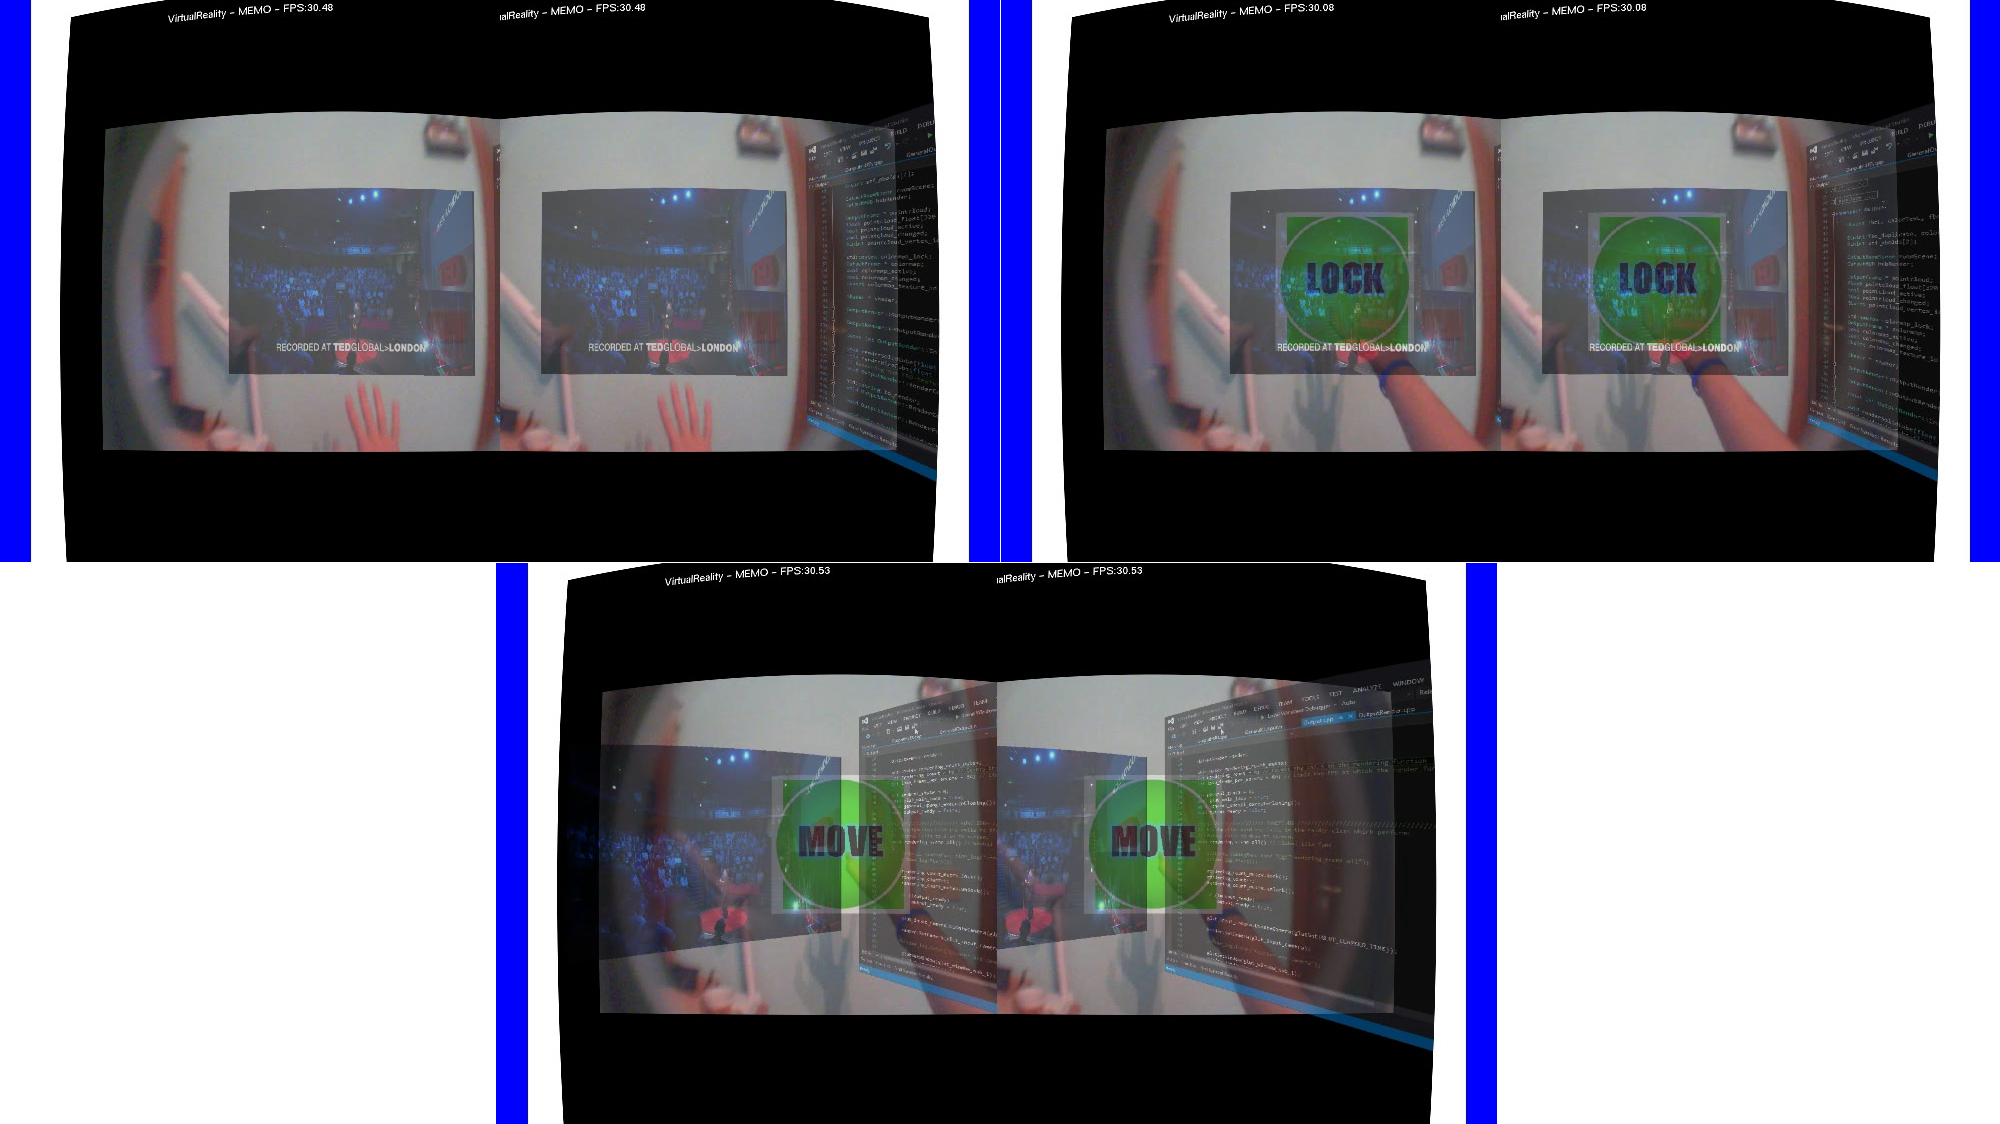
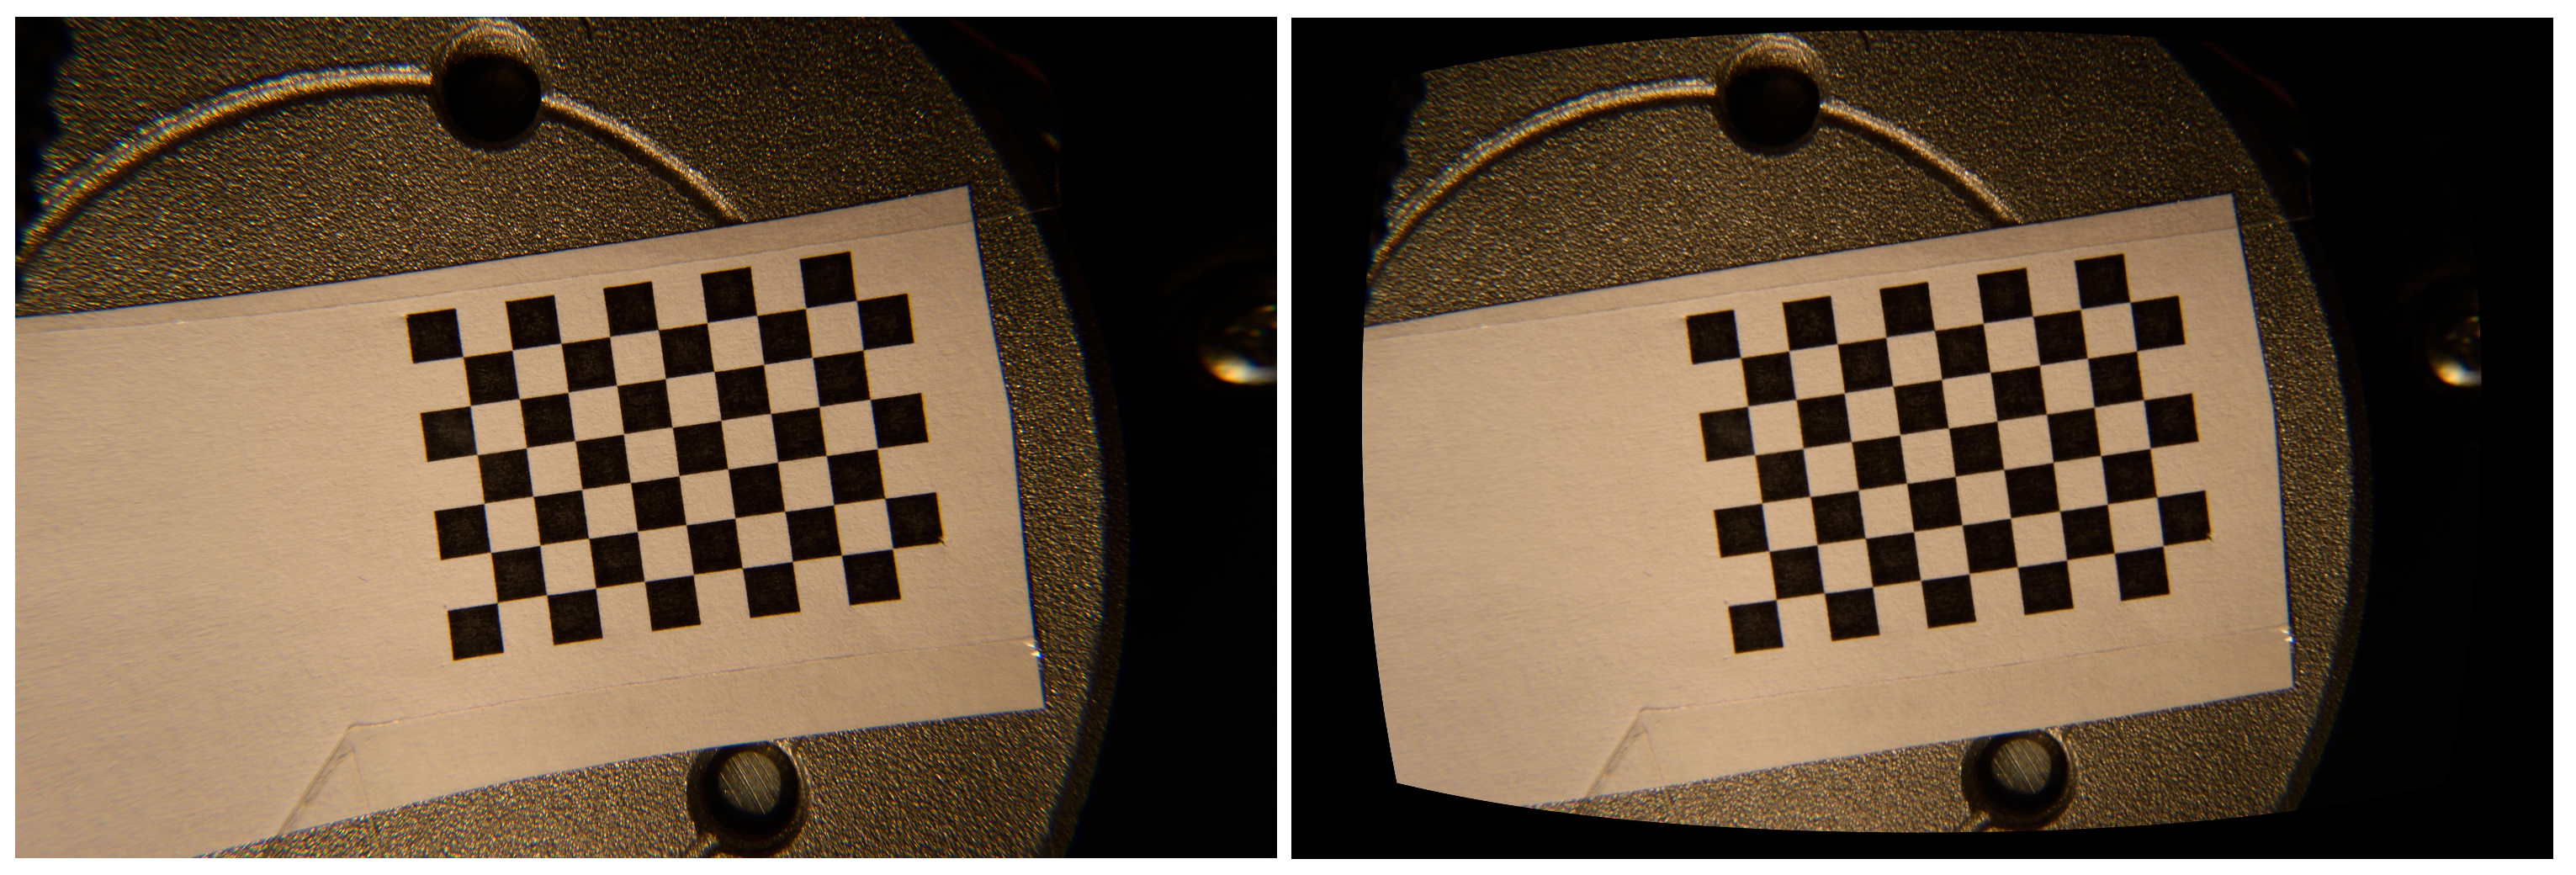
As the need for a better support was needed, I went with hard-plastic, but it turn out pretty heavy and fragile. It had a 7-inch display (in which I could crop the image via software, as it was used as a secondary screen attached to a PC) with a resolution of 1280*720 pixels and refresh rate up to 60Hz. The lenses were a couple of the famous 51mm aspheric lens that I found while looking for suggestion by other people. I also calibrated them using a small chessboard, as described in my thesis (A. Memo, “Multi-Modal Head Mounted Vision System with Gesture Interface”, University of Padua, 2015) and the result is a pretty decent image quality, but chromatic-aberration also needs to be addressed.
To recap, this are some of the key steps that need to be considered while building a prototype of such devices:
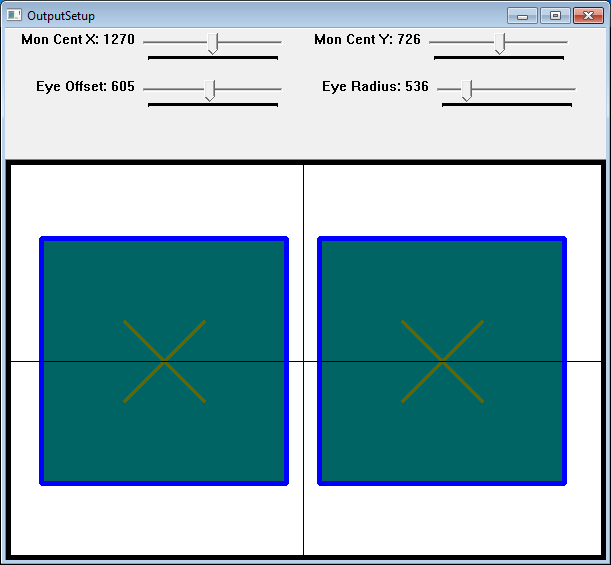
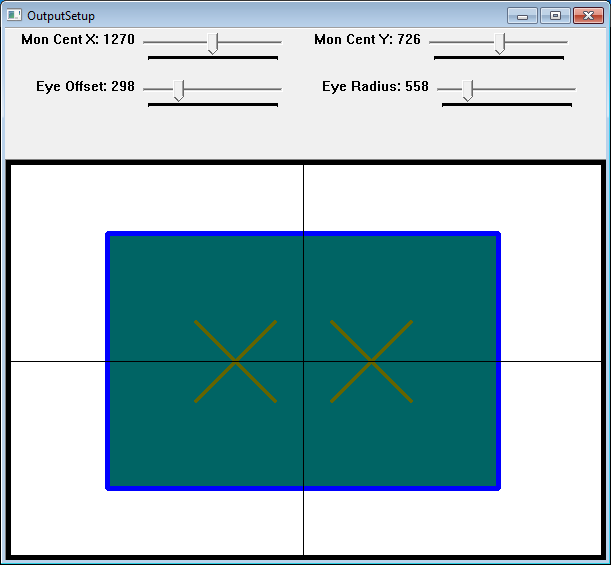
- Screen size: the difference here is between big and small. First you need to decide the ratio of our screen, it can be anything you can imagine/found: if your target is mostly movies and games, as they have a 16/9 aspect ratio (and we need one frame for each eye), you want a screen that has a (16*2) 32/9 ratio. Instead, if like me you want something for augmented or virtual reality, then you just want to have a reasonable surface to dedicate at each eye. Second you need to figure out the main dimension, let’s say the width. If as before you want to use for media-content, then as most of that material is supposed to have the user looking mainly at the center of the screen, you want that the distance from each eye-center is equal to half of the width of the entire screen. The images below explain it. Suppose we have two monitor with 2560x1440 pixels of resolution. One (on the left) with a width of 14cm and one on the right with a width of 30cm. As shown in the images, if the user (like me) has a interpupillary distance of 70mm, the monitor on the left will be able to show the same content (the greenish box) using more pixels. On the right instead, to show the content big enough, they are overlapped causing a cut-off of the area. Some consideration: everything said here is intending lenses to focus to monitor have the optical axes perpendicular to it. This is required as making them not perpendicular (and thus being able to change the focus point on the monitor) will cause heavy-focus related problems. Solution? Use two monitor and put them at different angles, as StarVR did.
-
Optical system: as said before, if you are using a single straight display, you want to lenses optical axes to be perfectly perpendicular to the monitor. Also, you need the at the right distance from it: to know the exact distance for your lens, I suggest you to follow the explaination in this video. Basically you make a straight laser go trough your lens and see where the lines intersects on the other side: be careful, the laser must be parallel to the lens optical axis.
-
Building: now that monitor and lenses are chosen, to put everything together is really up to you with your personal skill. This process is both fun and annoying, only suggestion I can give you is to start with an easy shape and material, and gradually improve it.
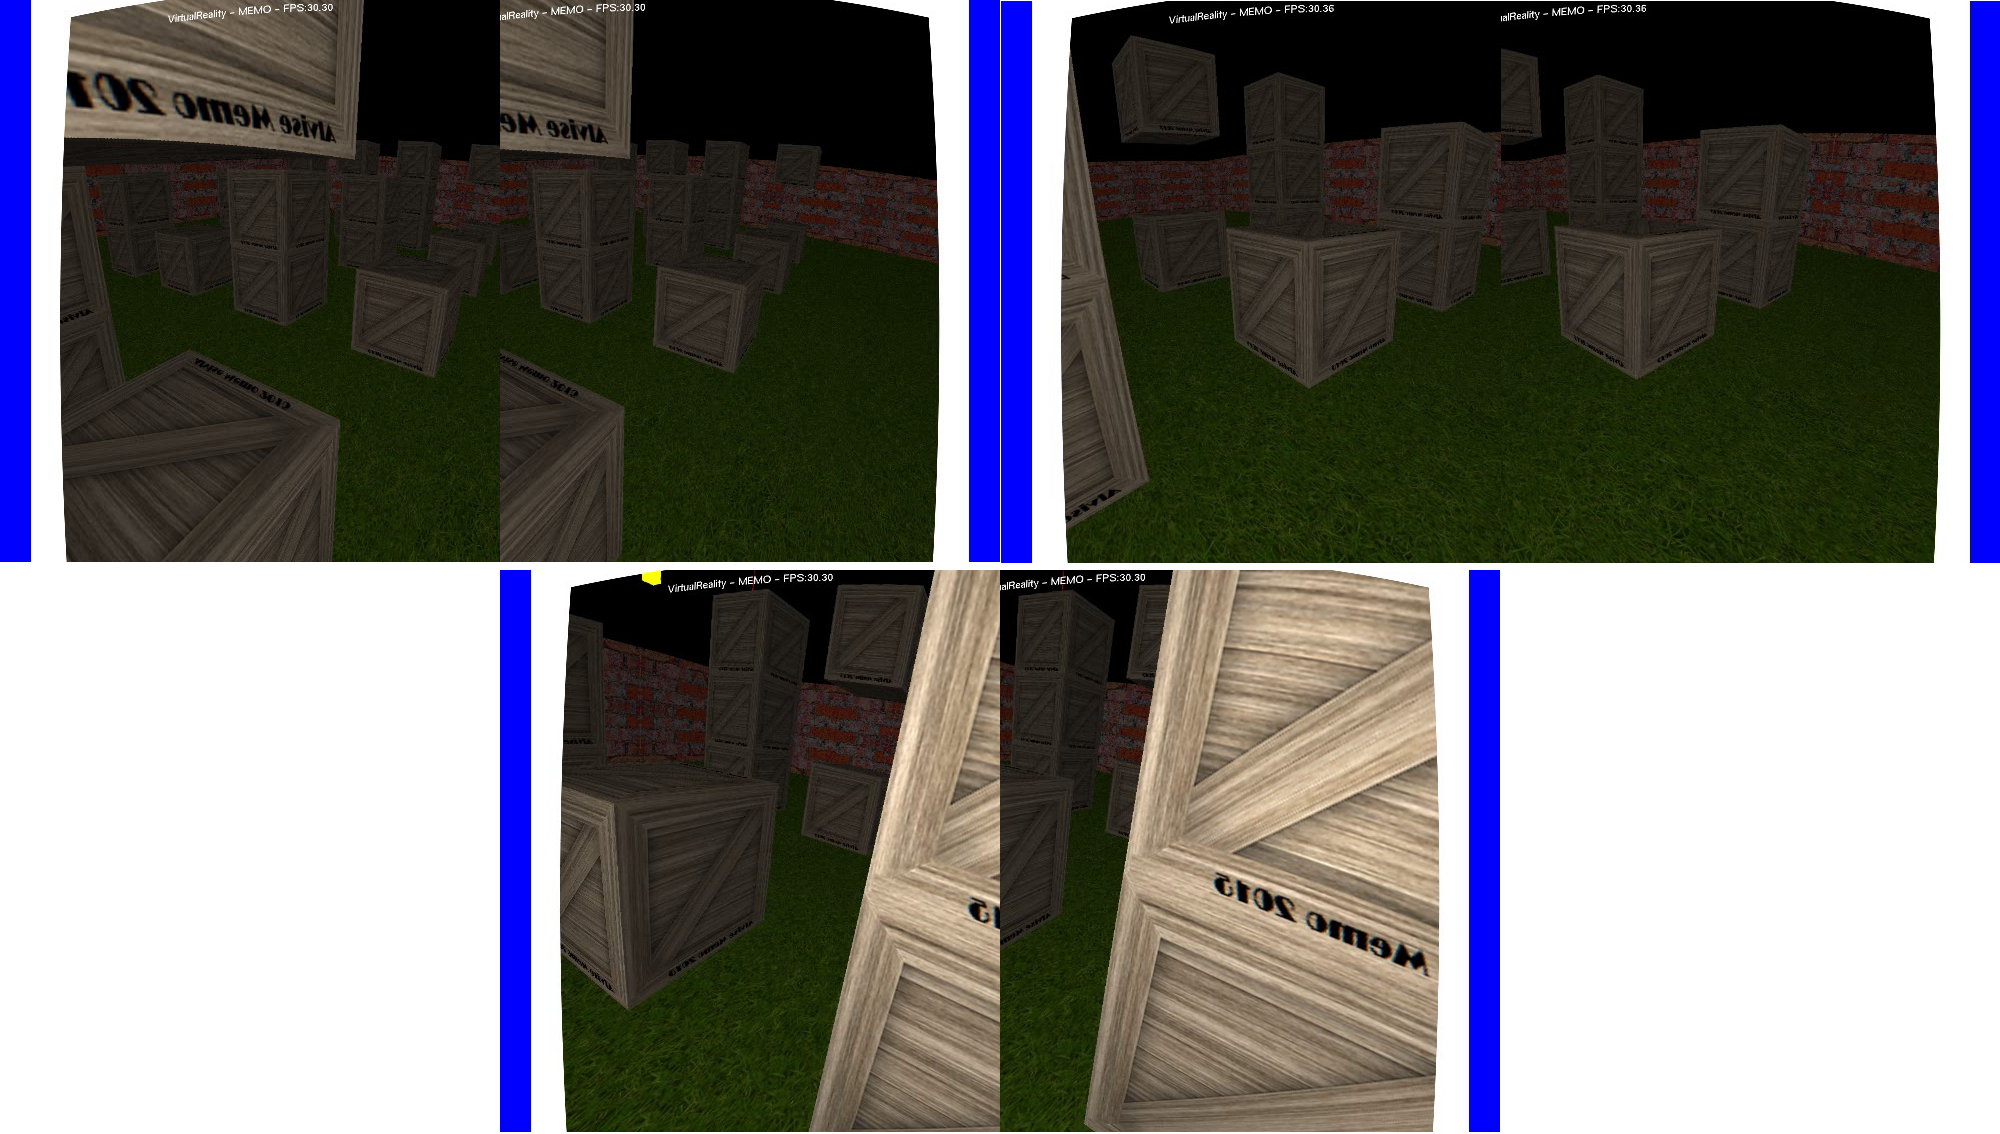
Here is one of my prototypes:
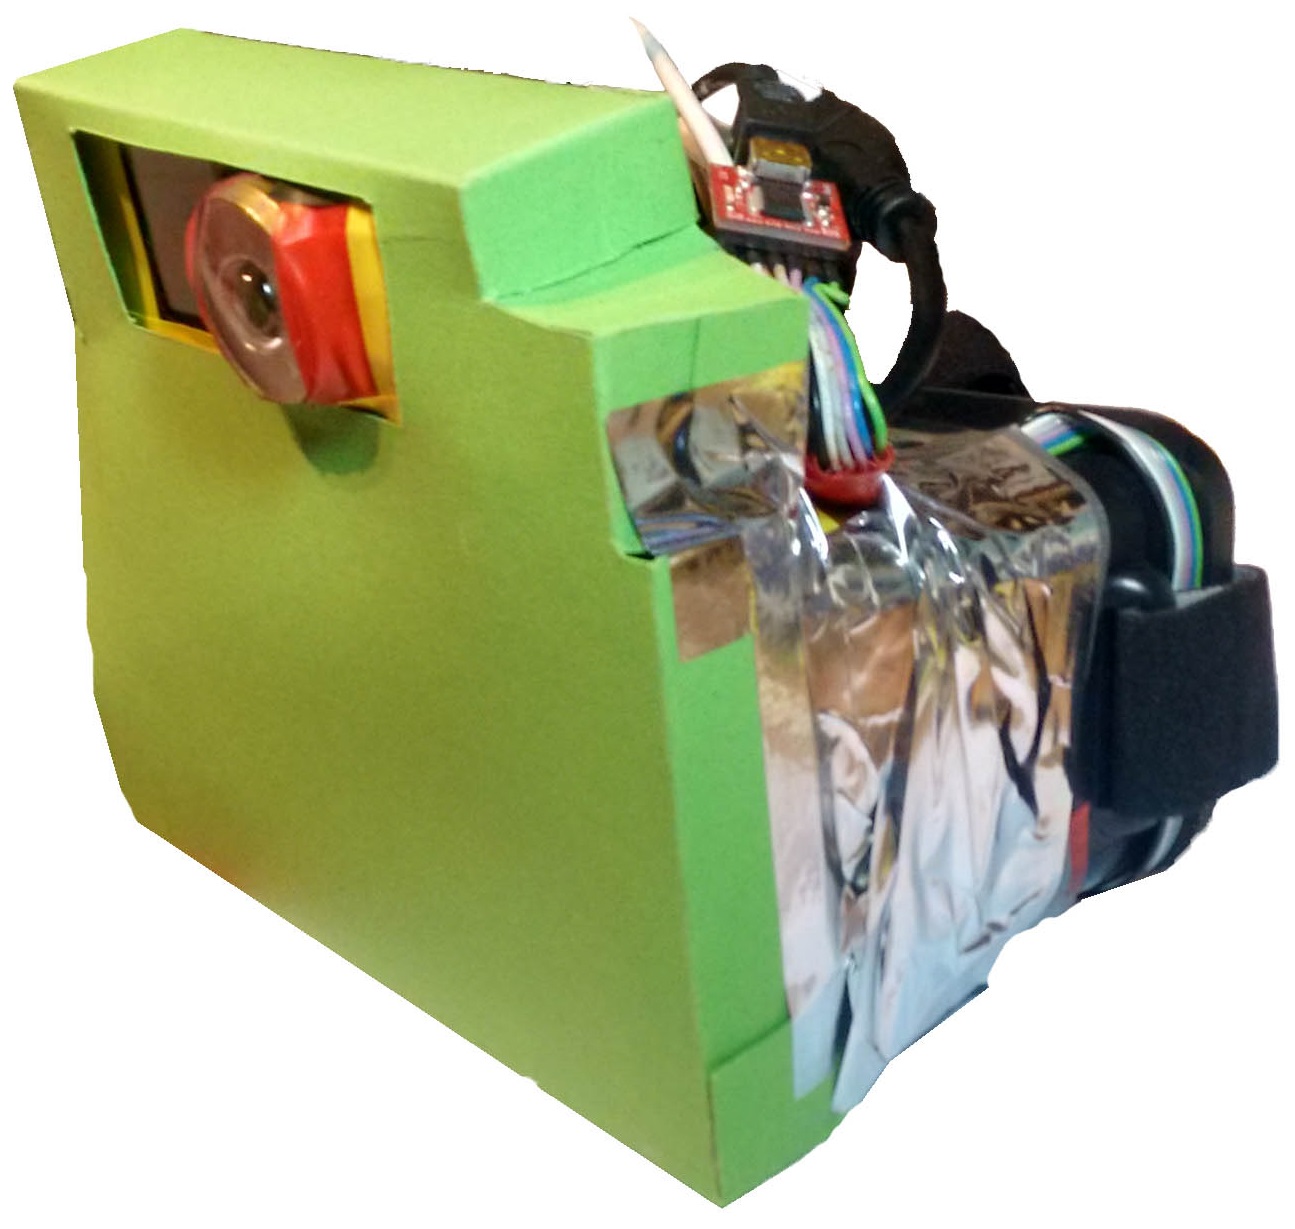
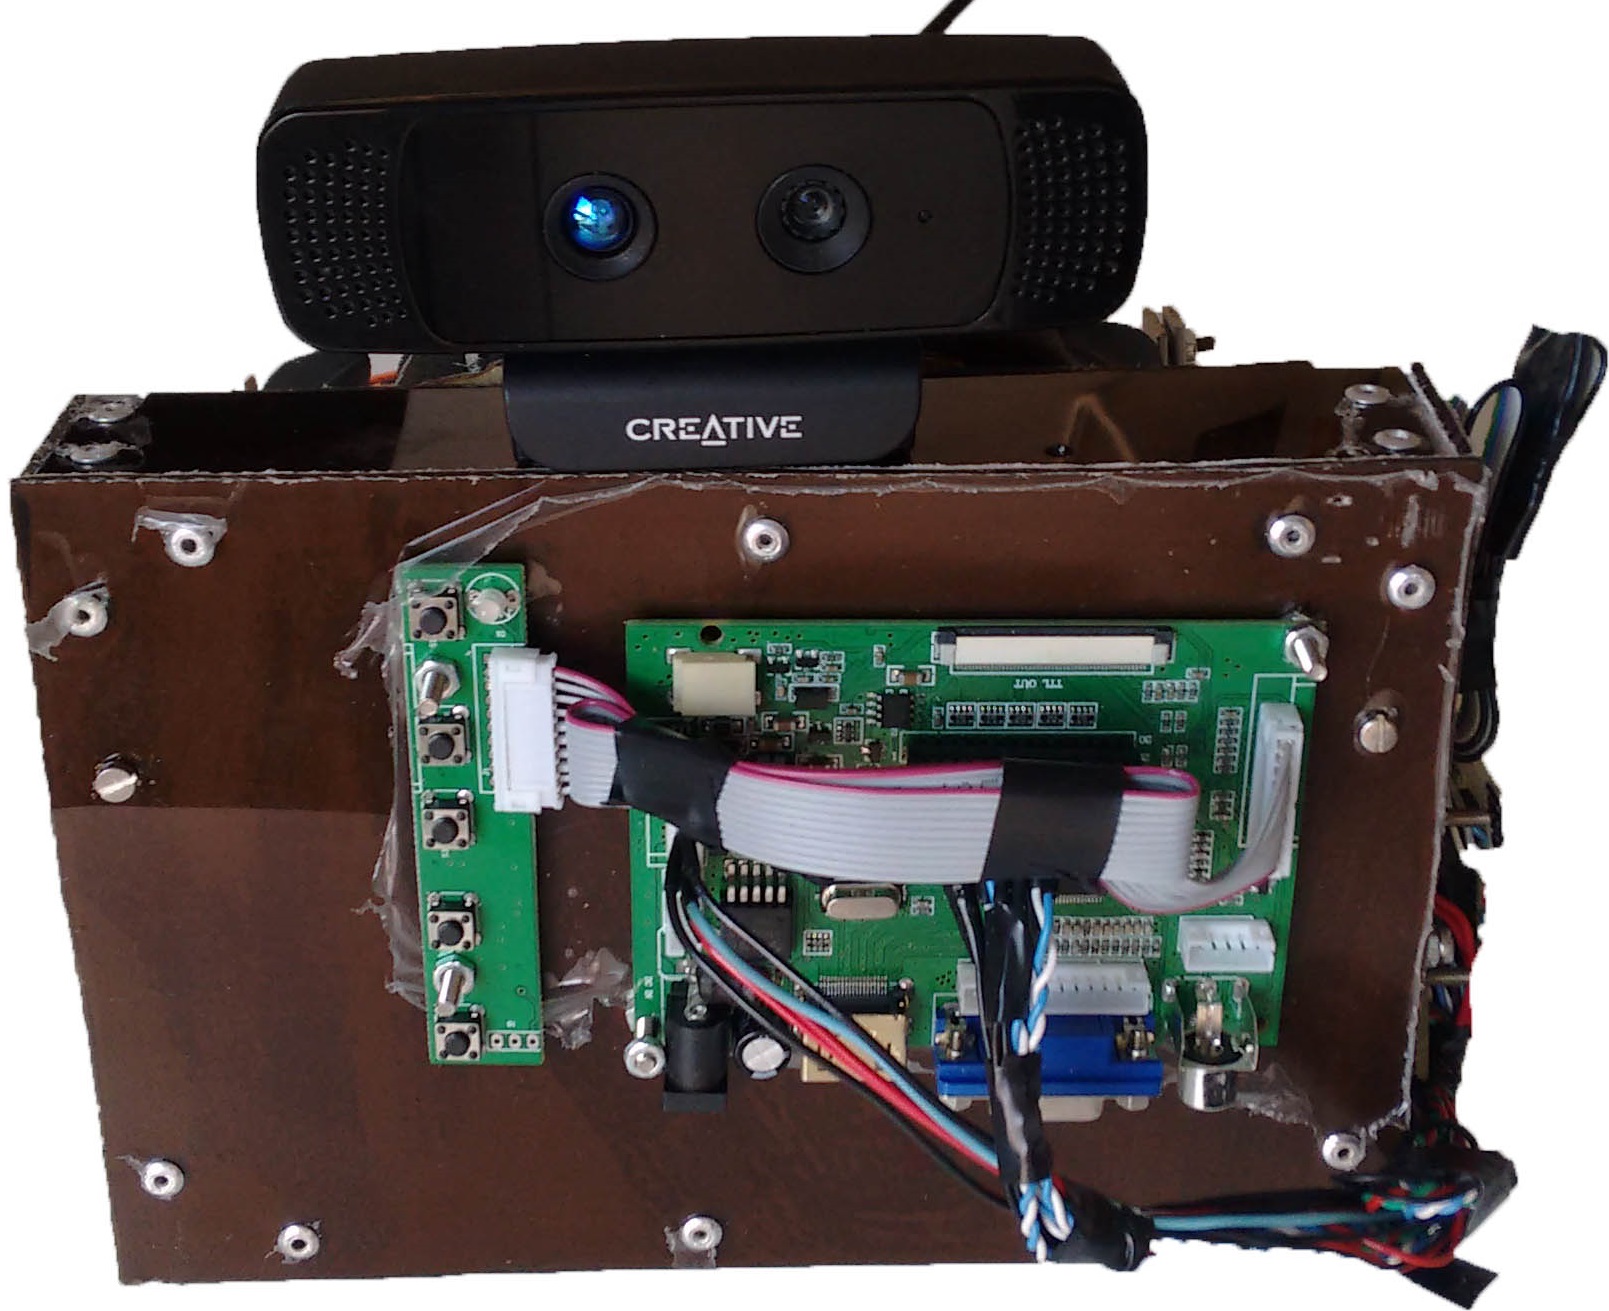
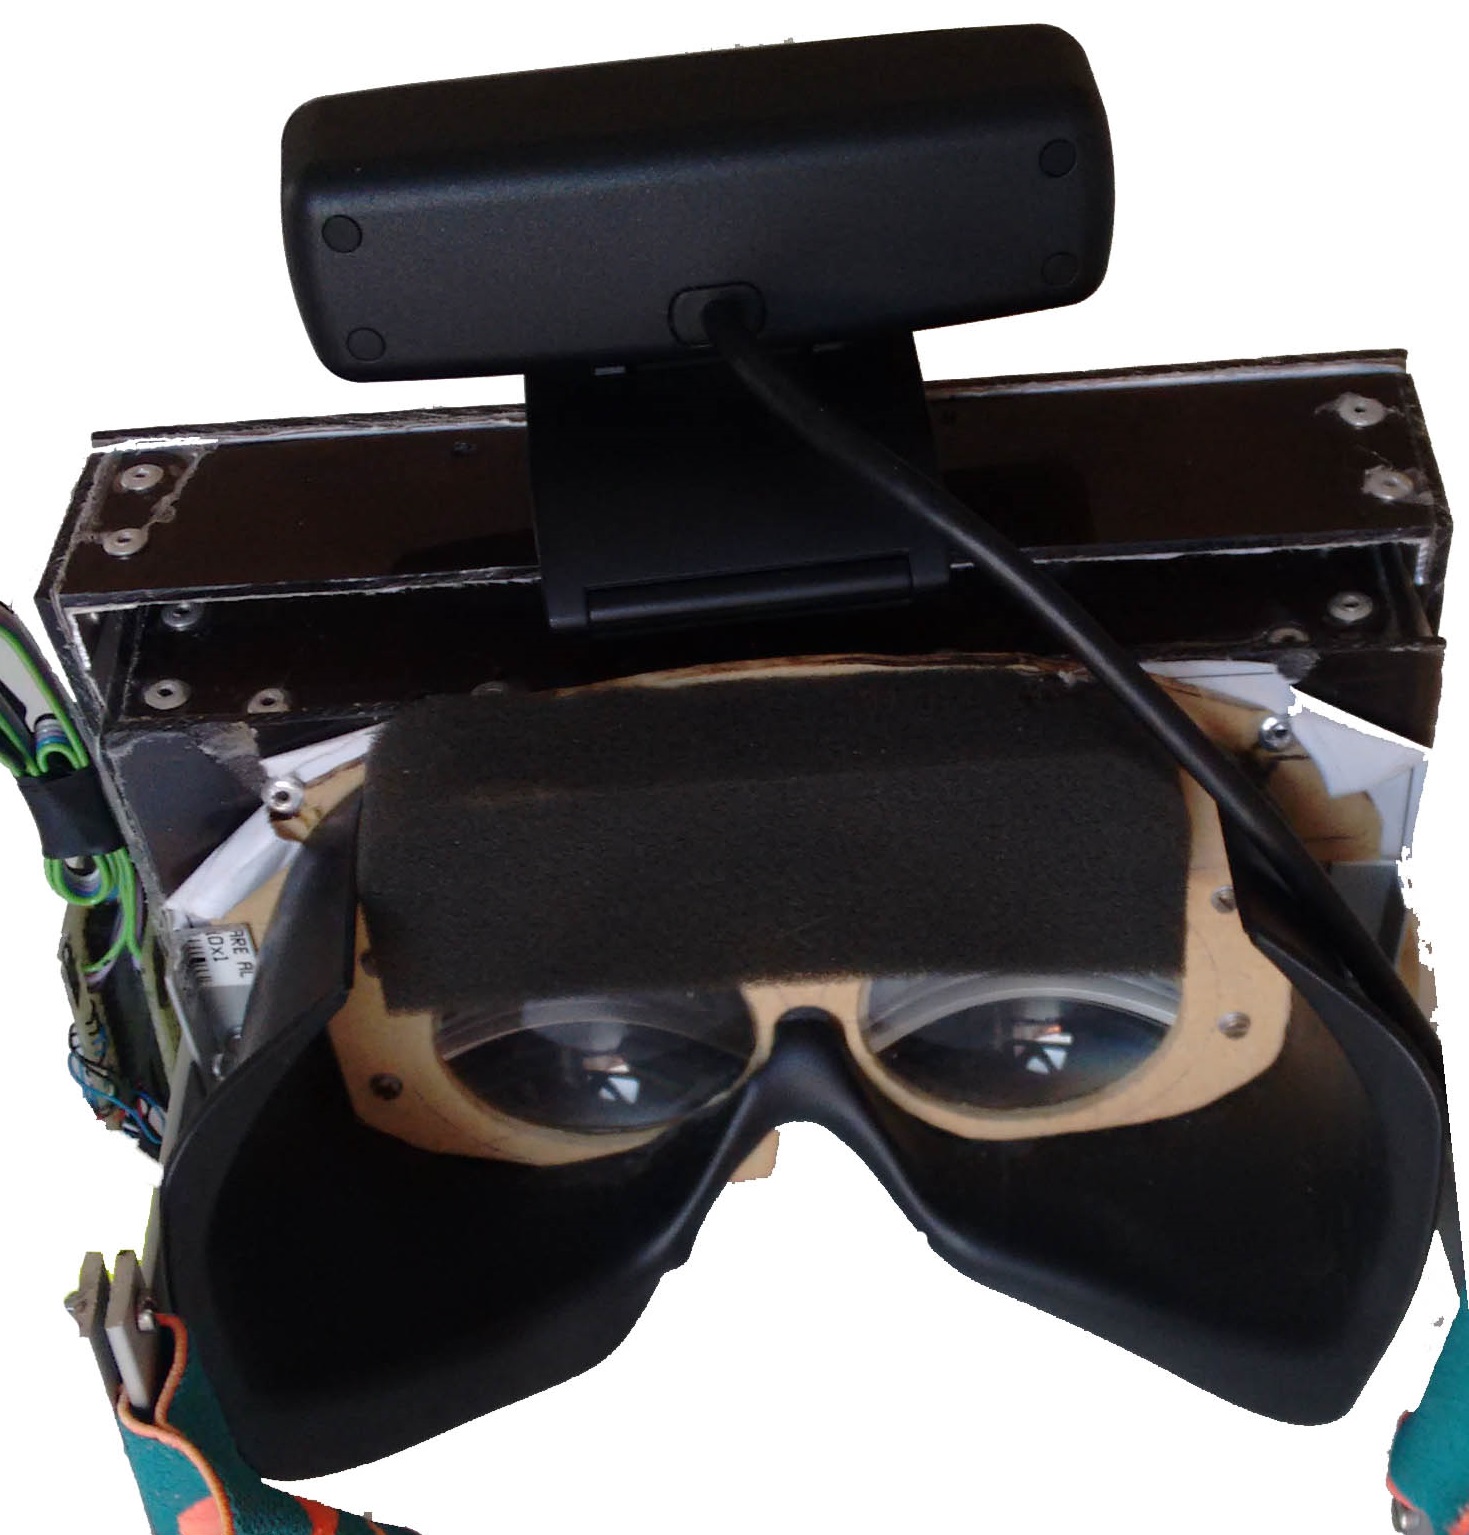
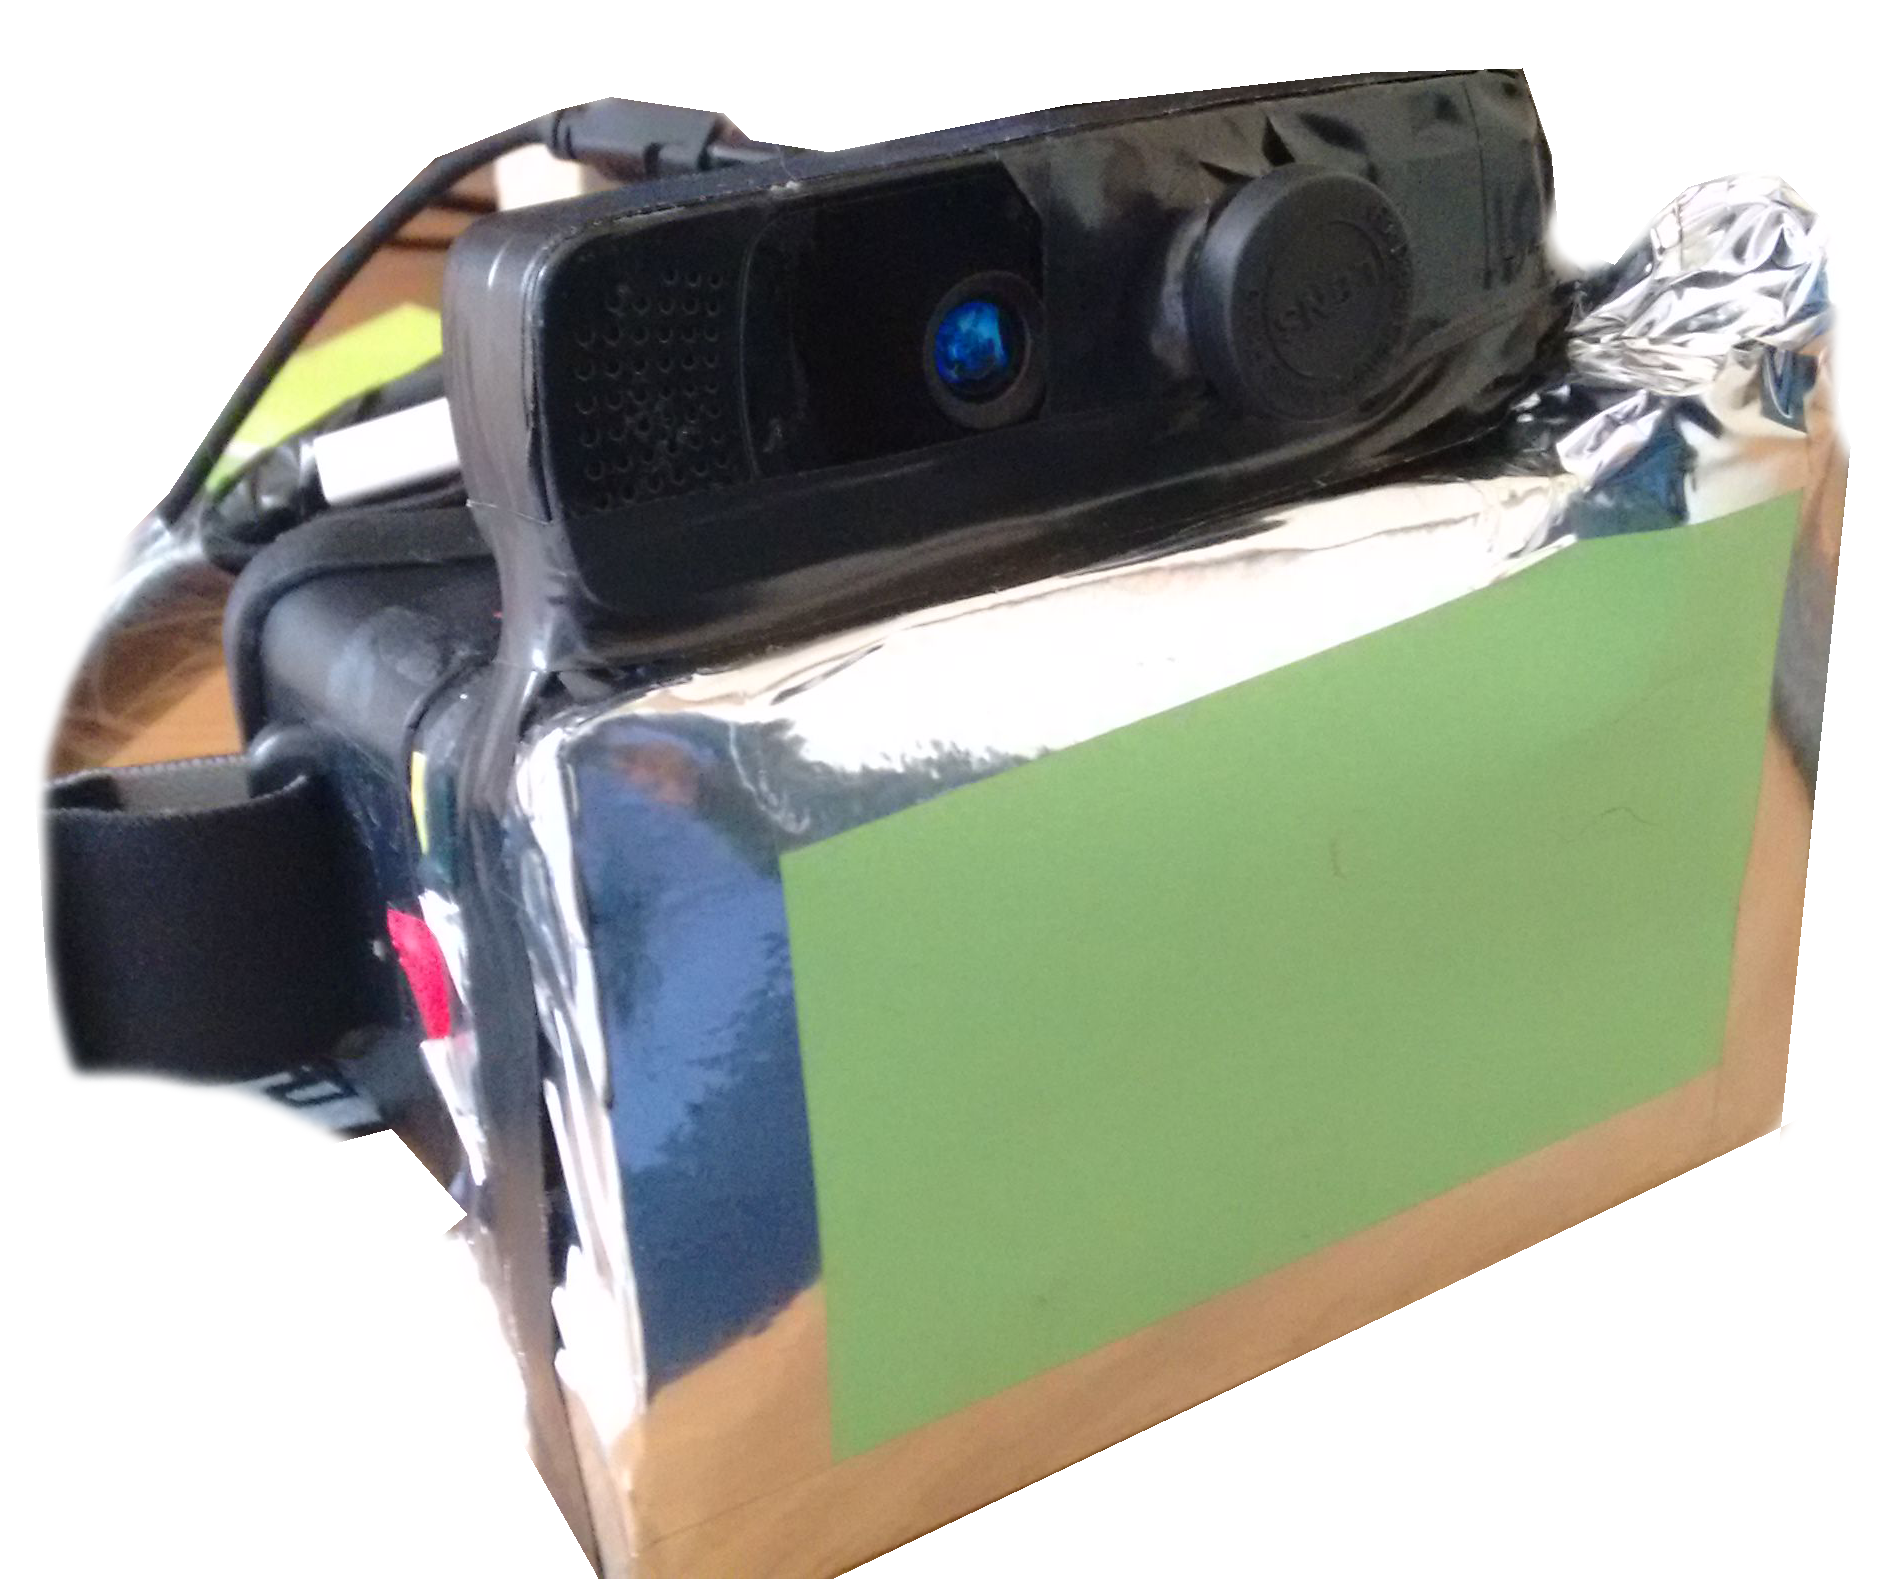
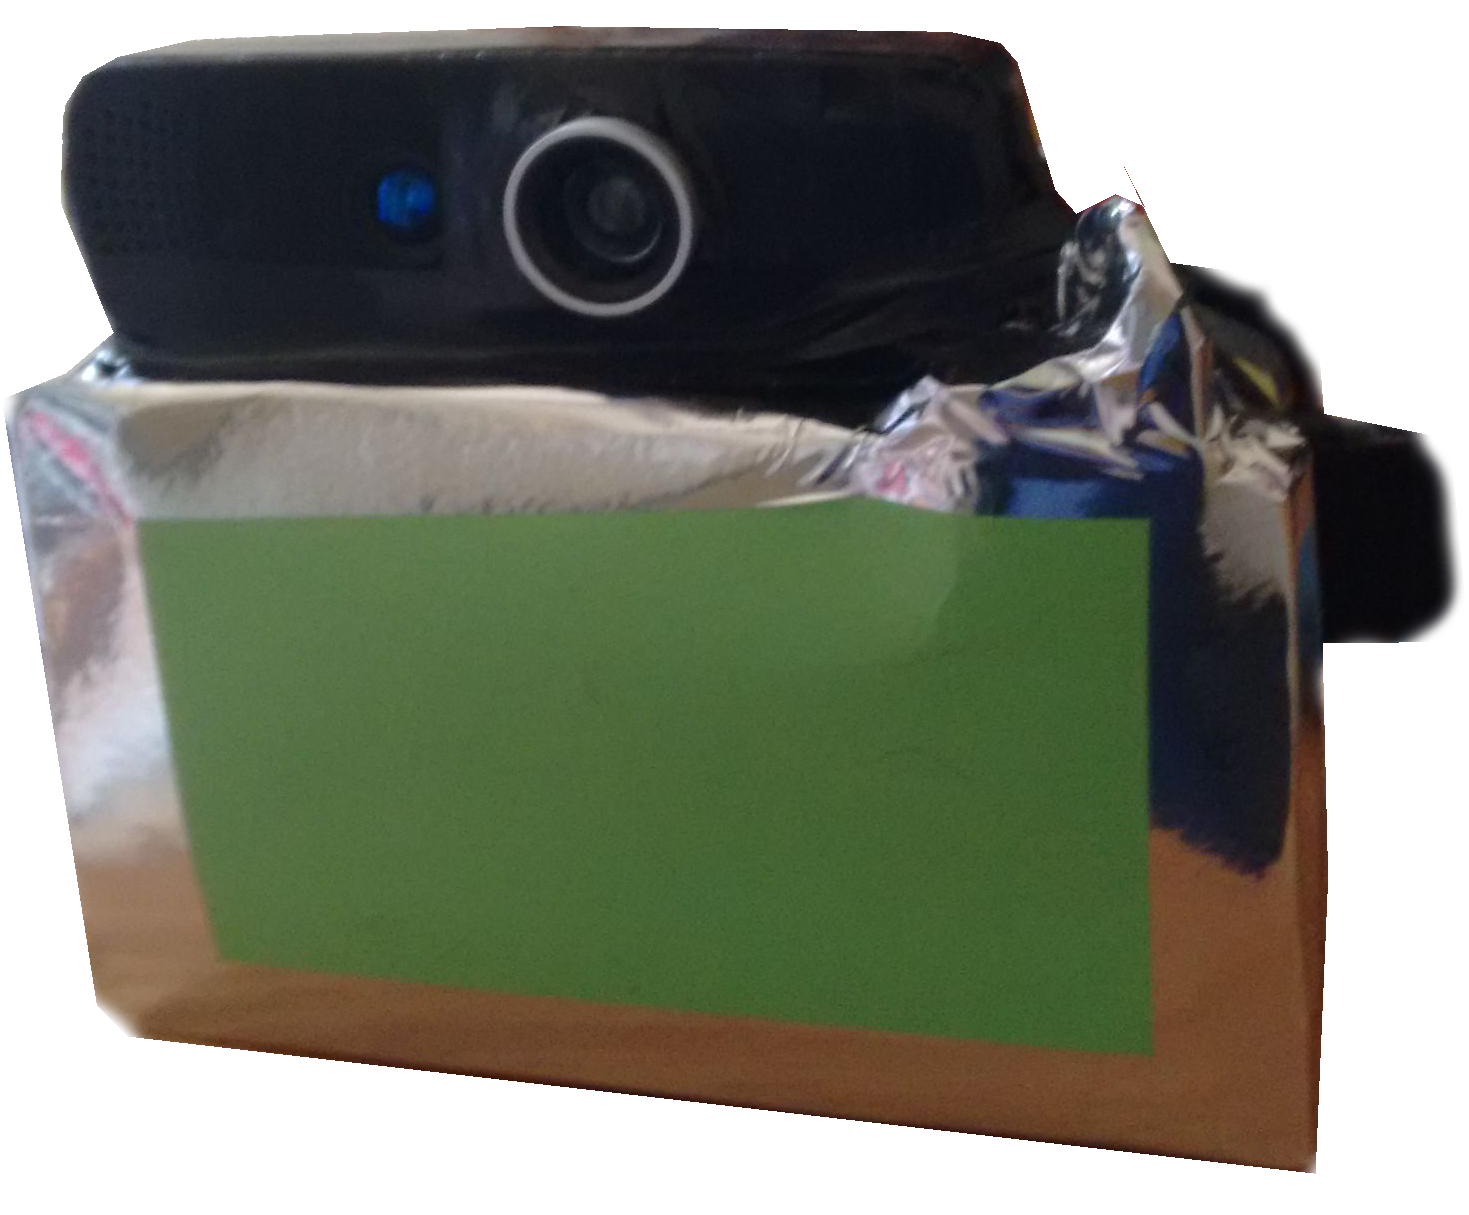
And the final attempt, which has:
- 2560x1440@60hx display with micro-HDMI board
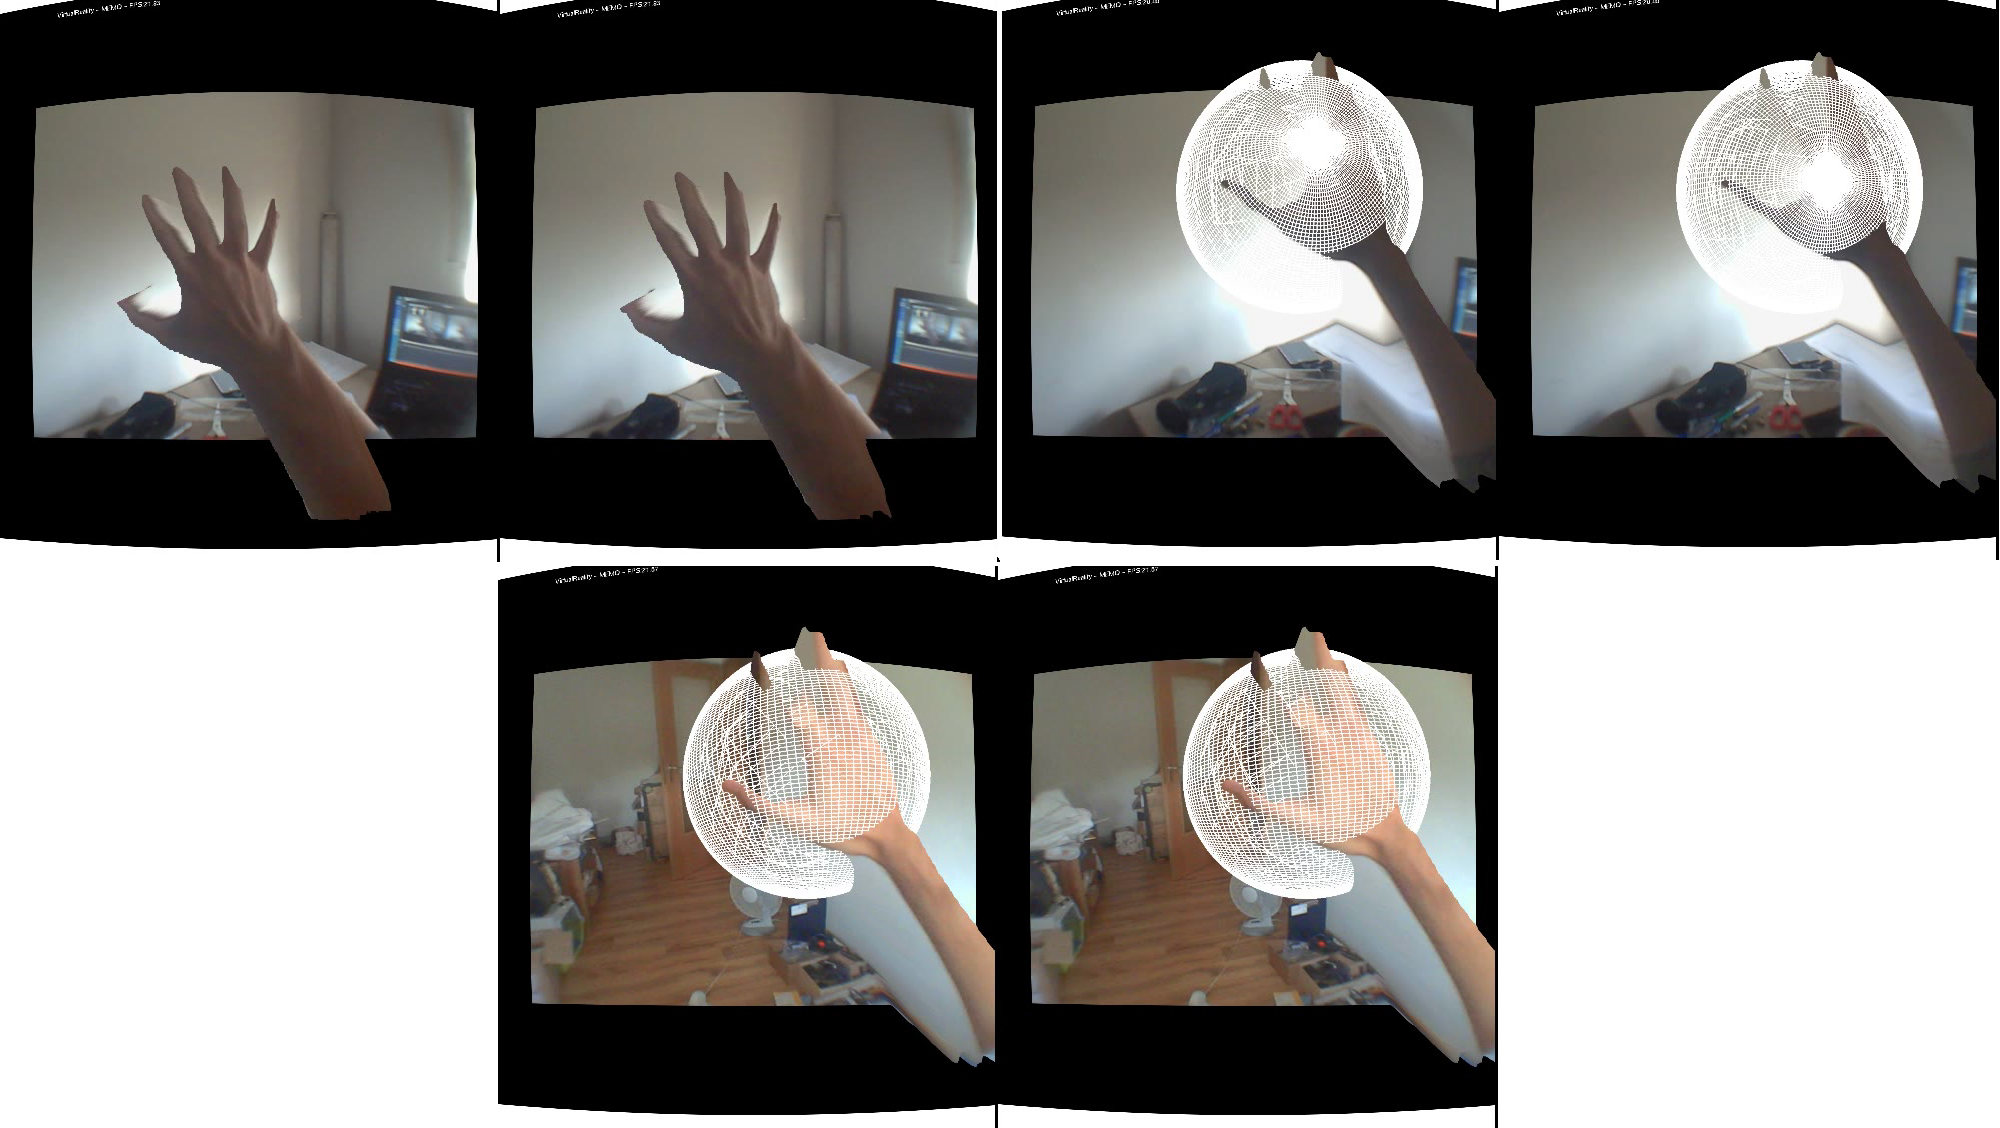
- Creative Senz3D ToF sensor with a Wide-Angle lens for the RGB camera
- 9-DOF IMU
- ColorCross holder modified for two 51mm aspheric lenses
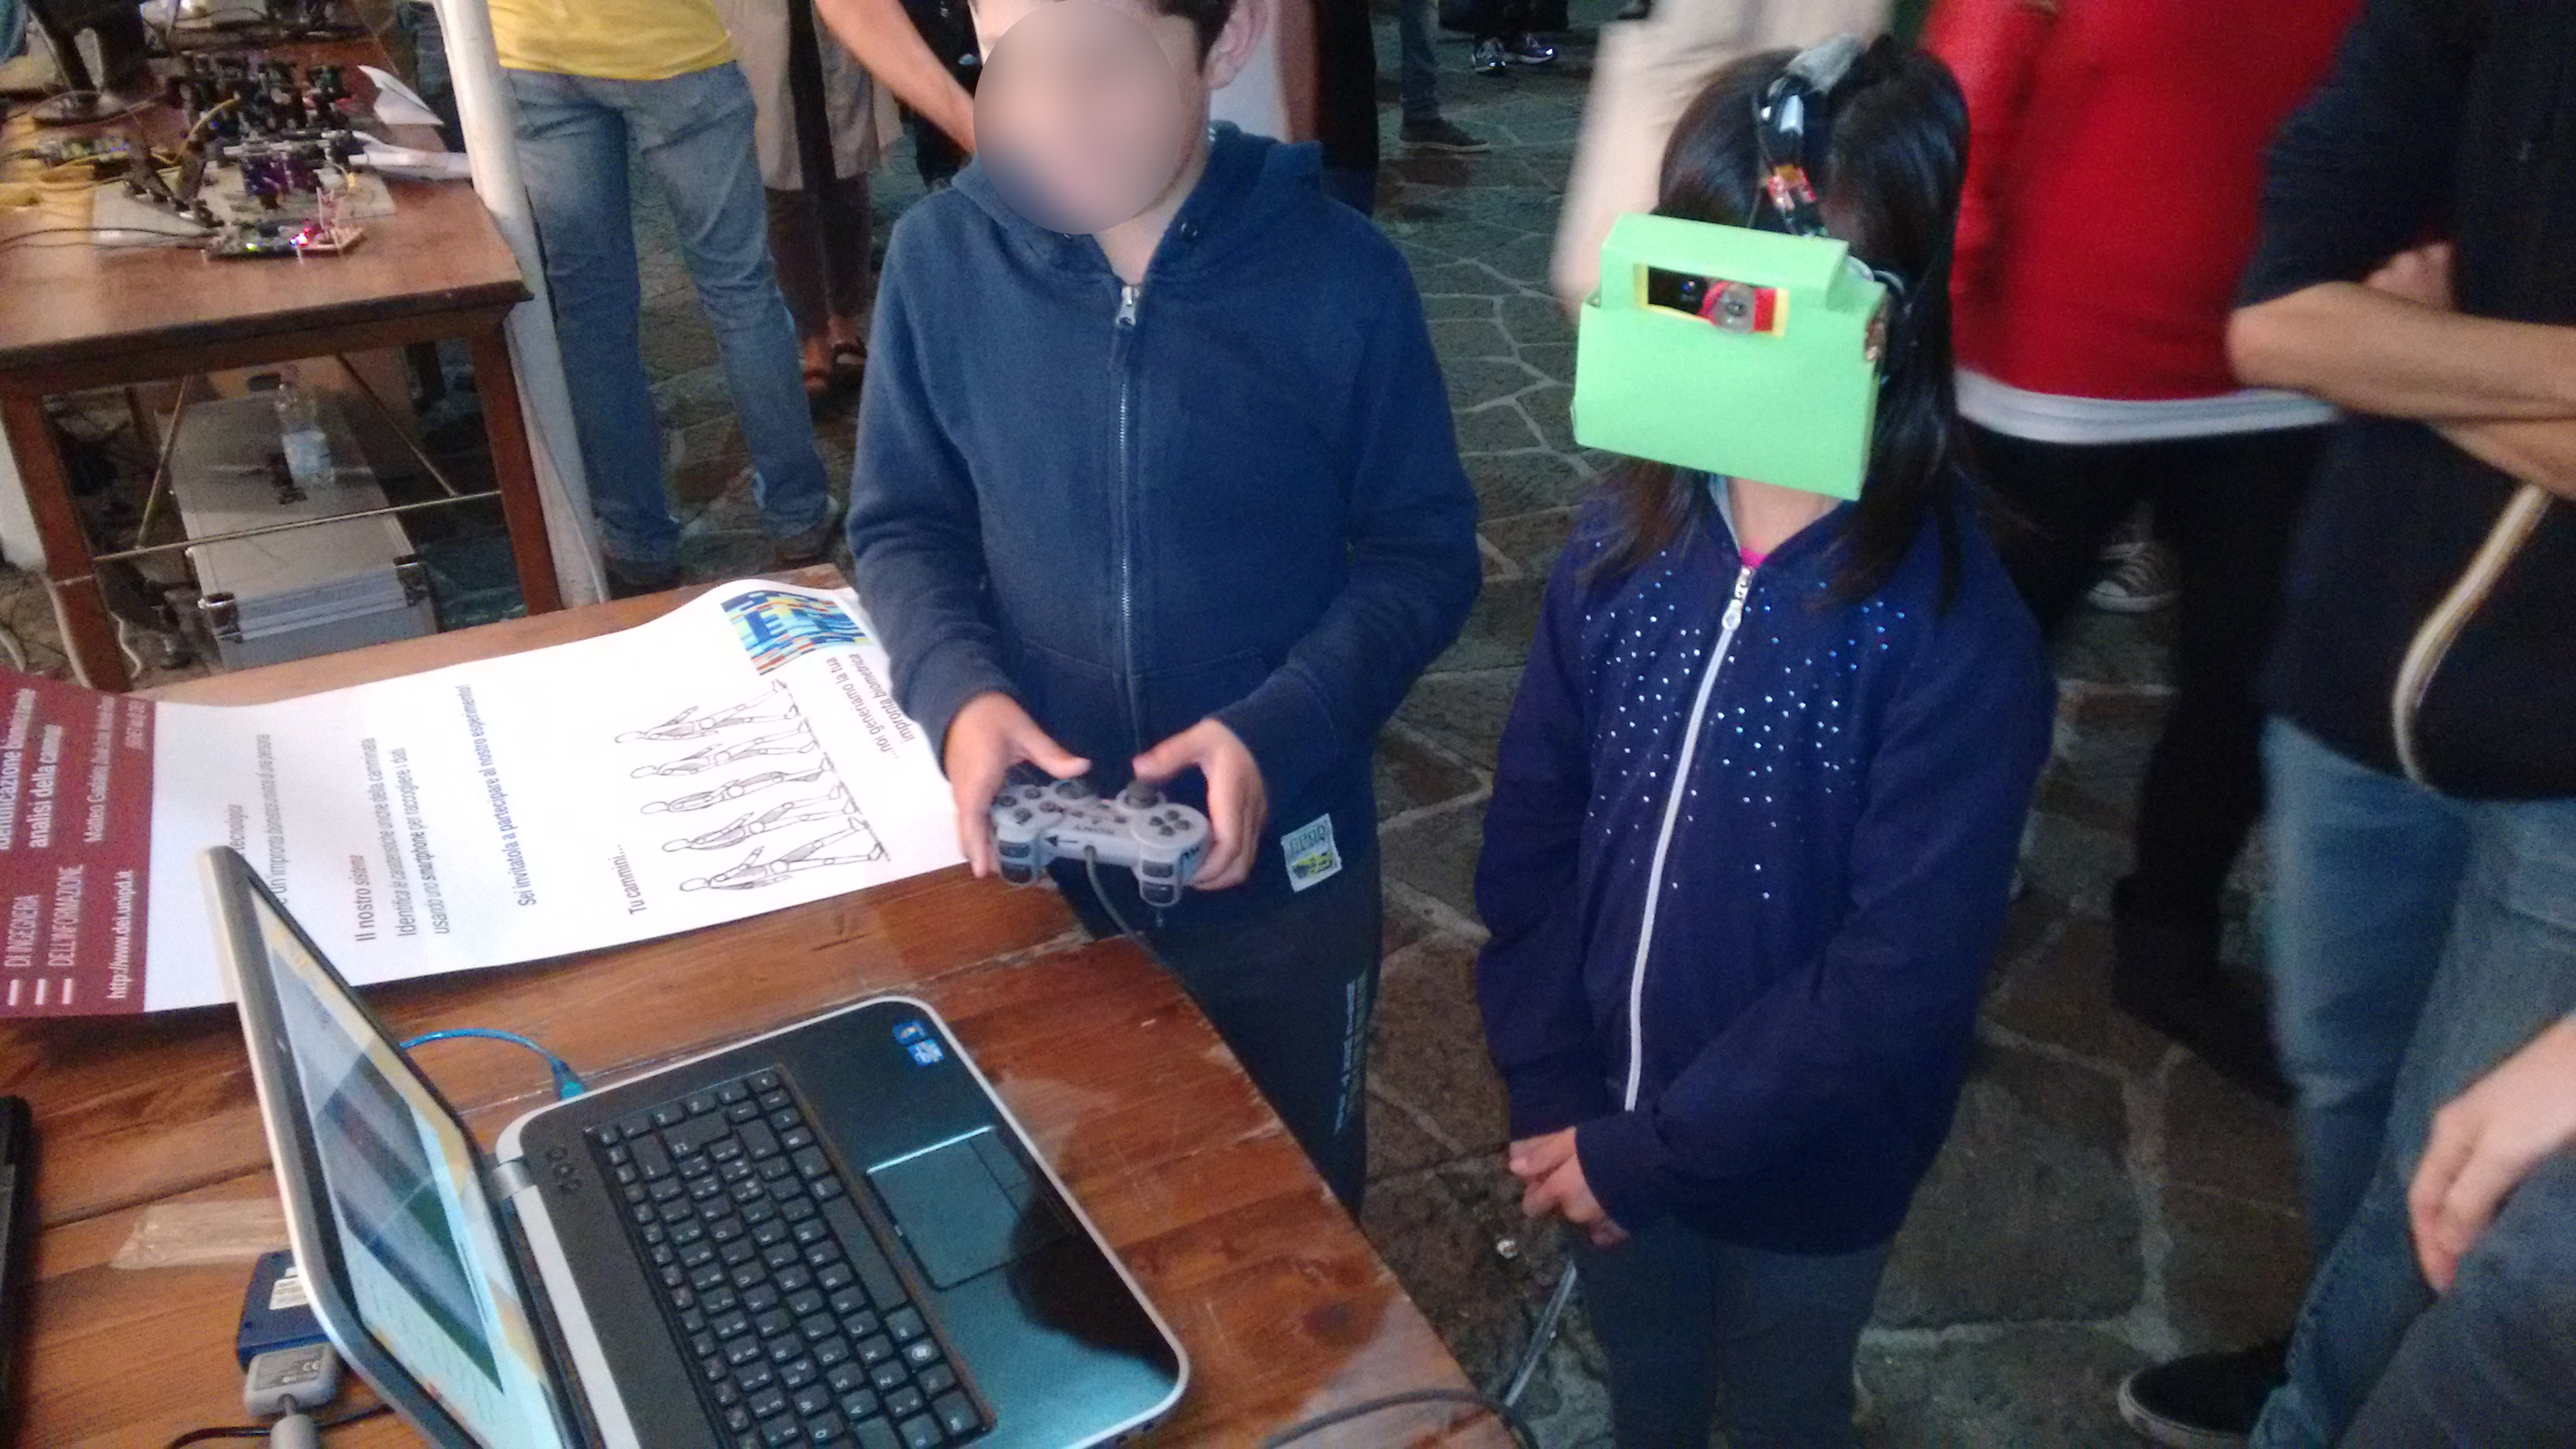
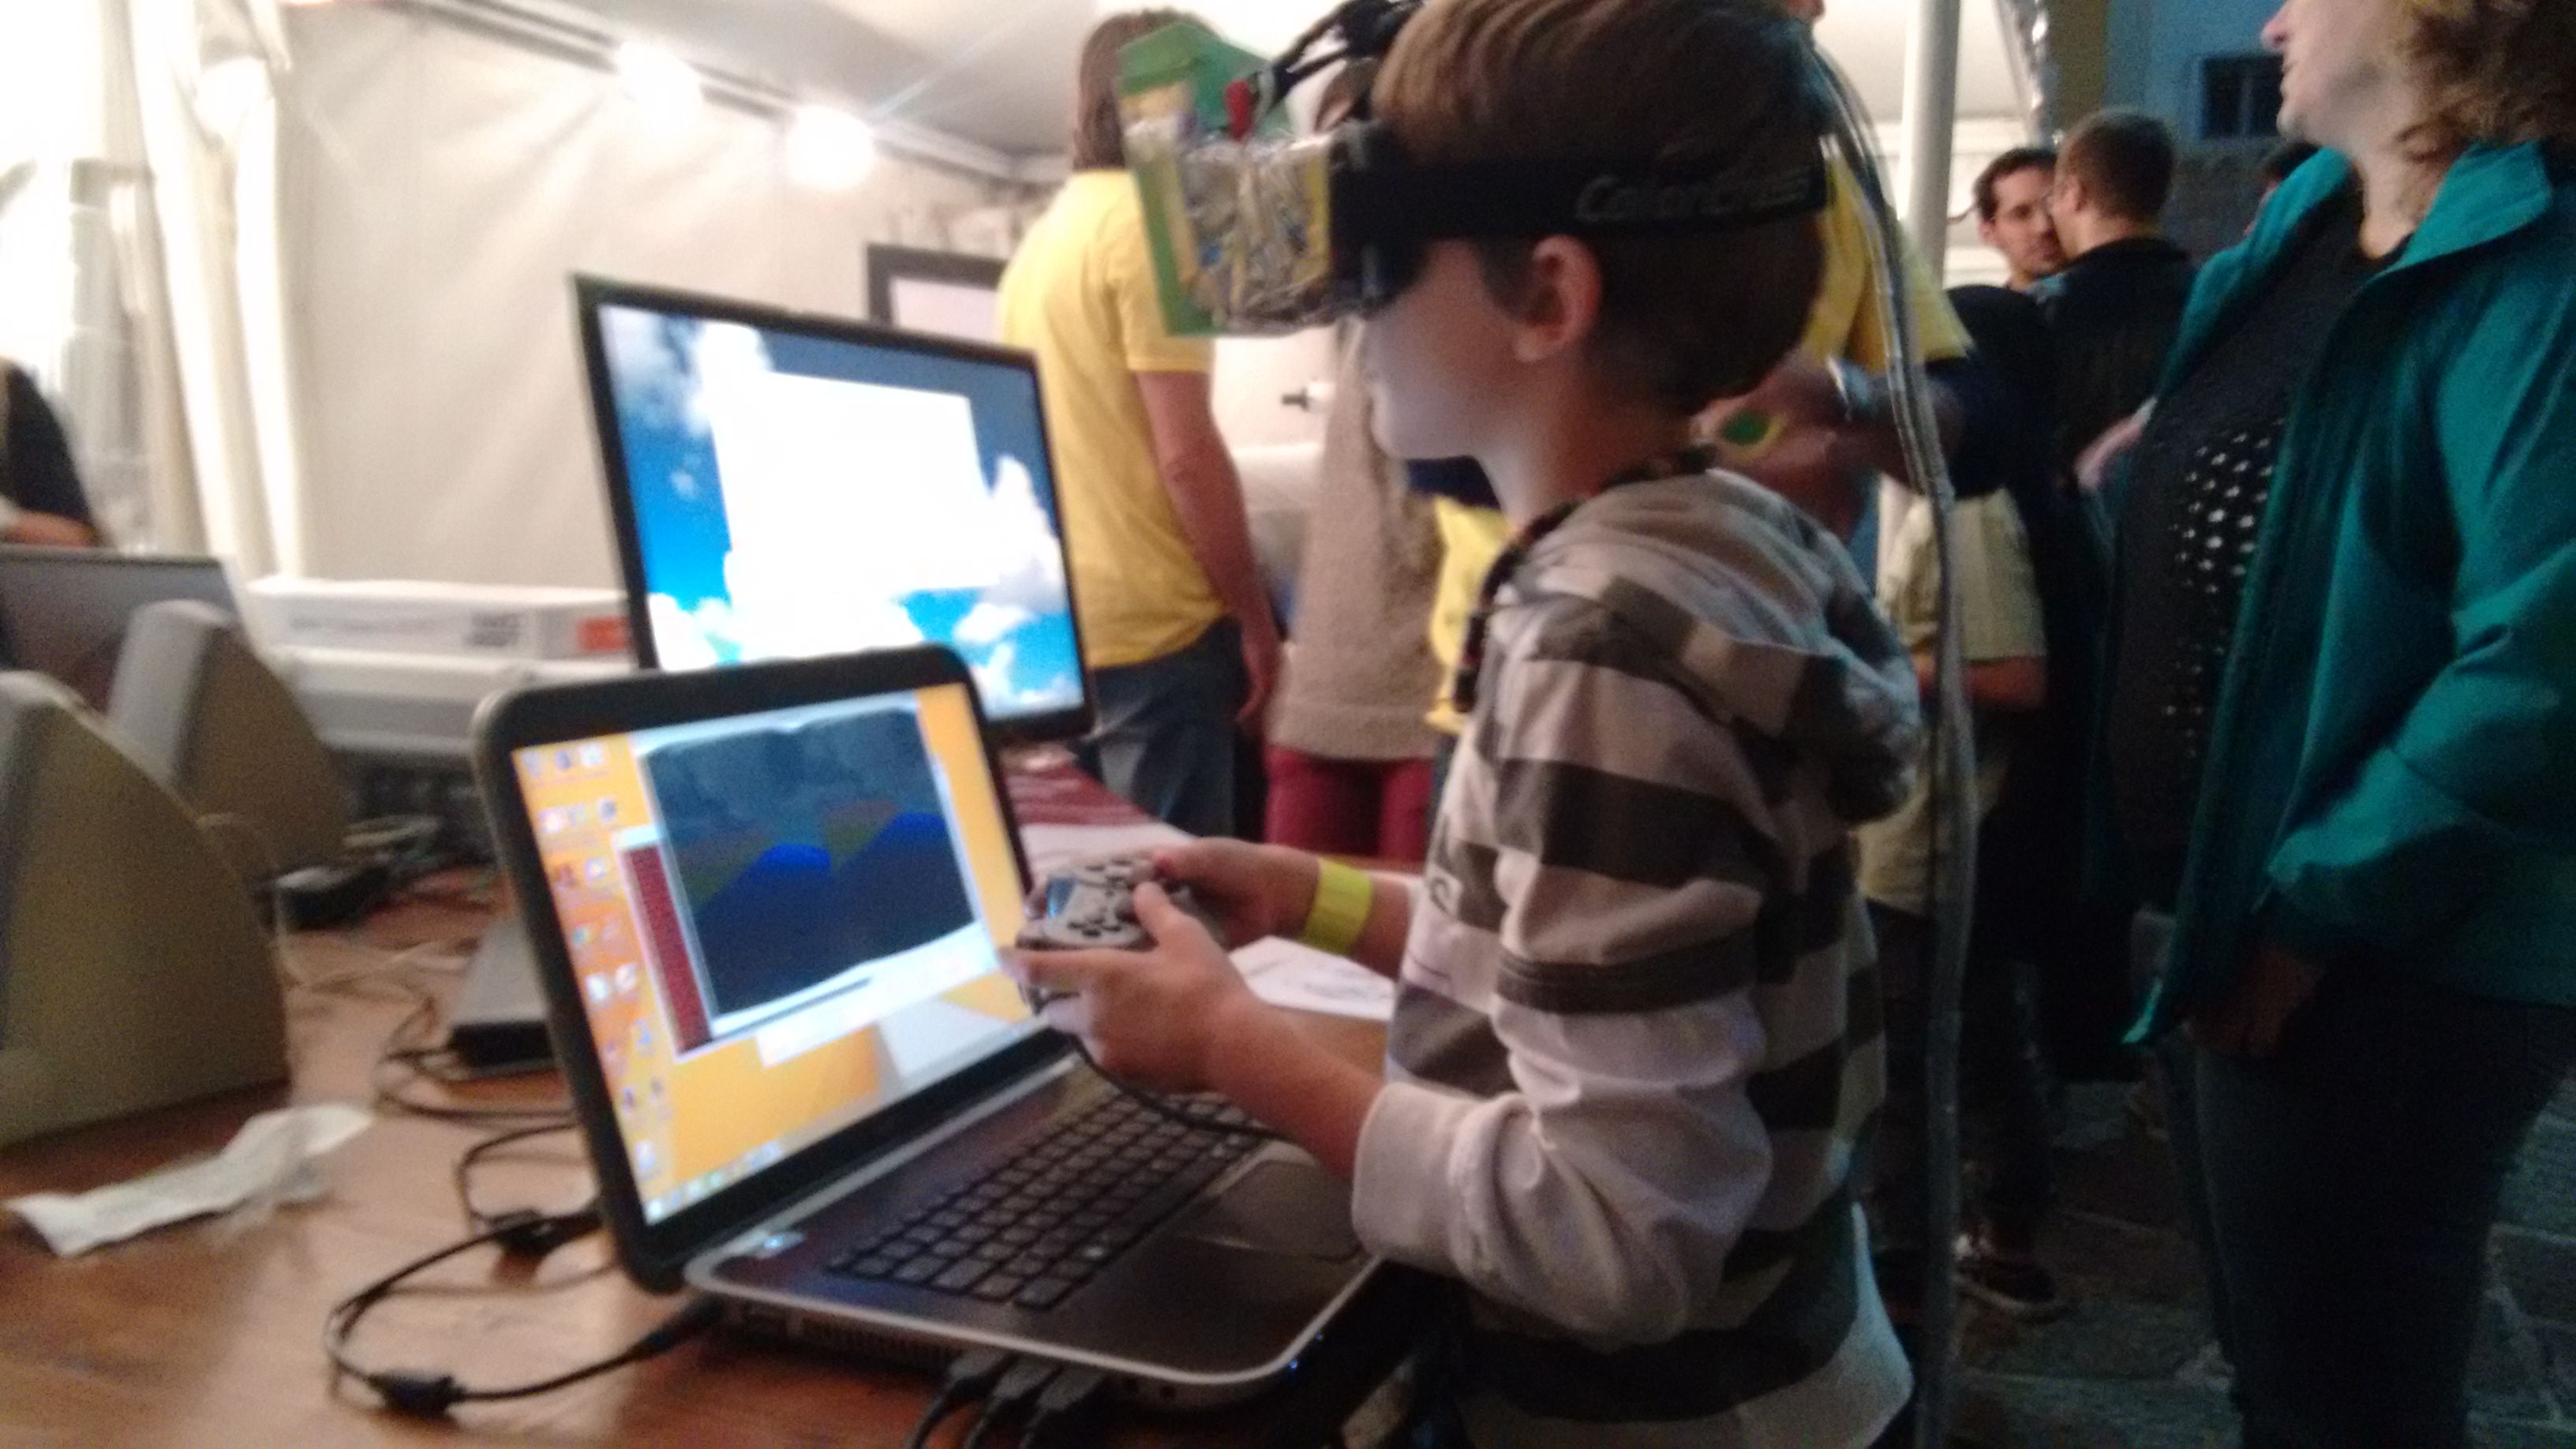
And some young-user giving their best feedback at a local presentation!